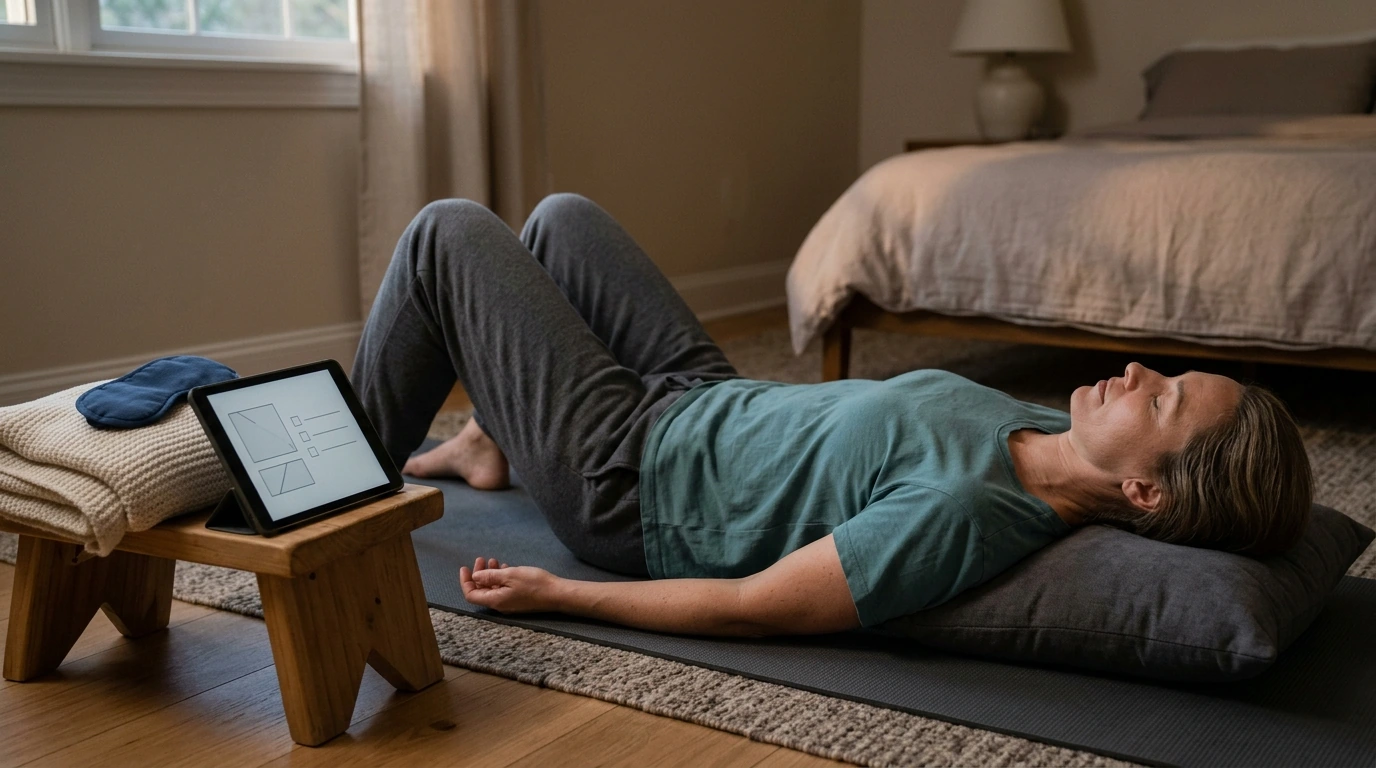
Progressive relaxation pairs simple muscle tension-and-release with mindful breathing to help the body downshift. A checklist format makes the practice easier to start, easier to finish, and easier to repeat—especially on busy days when focus is limited. This guide walks through what progressive relaxation is, how to use a printable or digital checklist, and how to build a short routine that fits morning, midday, or bedtime.
Progressive relaxation (often called progressive muscle relaxation) involves gently tensing a muscle group for a few seconds, then releasing and noticing the contrast. The purpose isn’t to “force” relaxation—it’s to practice sensing tension, letting go, and returning attention to the body with less effort over time.
A checklist helps because it lowers decision fatigue: the next step is always visible, even when the mind feels scattered. It also makes it easy to track completion and spot patterns—like which time of day works best, which muscle groups carry the most stress, and whether your sleep quality changes over a week or two. For additional background on relaxation approaches, the National Center for Complementary and Integrative Health (NCCIH) and the Mayo Clinic both provide useful overviews.
If you want a ready-to-use template, Your Ultimate Progressive Relaxation Checklist – Printable Progressive Relaxation Meditation Guide, Digital Checklist for Daily Mindfulness Practice keeps the order consistent so you can focus on sensations instead of remembering steps.
Start by choosing a format: print one page for a clipboard, desk, or fridge—or use a tablet/phone notes app to mark checkboxes. Next, pick a default session length: 5 minutes (quick reset), 10 minutes (standard), or 15–20 minutes (deeper unwinding). The goal is to have a “default” you can do without negotiating with yourself.
Make it automatic by pairing the checklist with an existing habit: after brushing teeth, after lunch, or before bed. Then set the environment: sit with feet grounded or lie down, loosen tight clothing, and silence notifications. Optional supports—like a light blanket, eye mask, or low-volume white noise—can reduce sensory distractions and make it easier to stay with the practice.
| Format | Best for | Simple way to mark progress |
|---|---|---|
| Printed page | Desk, bedside, shared home routine | Pen checkmarks or highlighter |
| Phone/tablet | Travel, work breaks, on-the-go | Checkboxes in notes app or PDF annotation |
| Re-usable sleeve | Daily repetition without reprinting | Dry-erase marker |
Begin with three slow breaths: inhale through the nose, then exhale a little longer than the inhale if comfortable. Keep the effort gentle—about 30–50% intensity. Avoid cramping, pain, or breath-holding. A reliable rhythm is tense for 3–5 seconds, then release for 8–12 seconds while noticing warmth, heaviness, tingling, or even neutral sensations.
Move through muscle groups in a simple order: hands and forearms → upper arms → shoulders → face/jaw → neck → chest/upper back → abdomen → hips/glutes → thighs → calves → feet/toes. If any area is hard to sense, switch to a micro-tension (a very small squeeze) or skip the tensing and just observe the area during the release phase.
Close with a “full-body release”: soften the jaw, drop the shoulders, unclench the hands, and let the tongue rest easily. This final moment helps your nervous system register that the practice is complete.
| Muscle group | Gentle tension cue | Release cue |
|---|---|---|
| Hands/forearms | Make a soft fist | Uncurl fingers; feel palms soften |
| Shoulders | Lift slightly toward ears | Let shoulders drop and widen |
| Jaw/face | Press lips lightly; clench gently | Unclench; let tongue rest |
| Abdomen | Tighten core mildly | Let belly soften with exhale |
| Legs/feet | Point toes or press heels | Let legs become heavy |
Do three breaths, then focus on shoulders/jaw, hands, abdomen, legs/feet, and finish with a full-body release. This version is ideal when you’re short on time but want to interrupt the buildup of tension.
Run the full checklist once at a steady pace, then add a second round of slow breathing at the end. If your mind wanders, use the checklist as your “return point” rather than restarting.
If sleep is a current priority, especially during major body changes, A Real-Life Guide to Better Sleep During Pregnancy | How to Improve Sleep in Pregnancy | Sleep Guide for Moms-to-Be | Digital Download can pair well with a bedtime relaxation routine.
For families or students building confidence through routines, a checklist approach can also support other daily skills, like Your Ultimate Young Leader’s Power Checklist | How to Be a Young Leader Digital Download.
Five minutes is enough for a quick reset, 10 minutes works well for a full-body routine, and 15 minutes can be great for a slower wind-down. The most effective duration is the one you can do consistently, so starting small is often the fastest way to build the habit.
No—gentle effort is the goal (about 30–50% intensity). Avoid pain or cramping and focus on noticing the contrast between “tension” and “release,” which helps your body recognize and drop unnecessary tightness.
Yes, it’s commonly used at bedtime. Try slower releases and a longer exhale; if you fall asleep earlier than planned, practice seated or do a shorter version earlier in the evening.











Leave a comment